Have you ever found yourself stranded, wondering how to jump start a car with a battery pack? I’ve been there, and it’s not a pleasant experience. That’s why I believe every driver should know this essential skill—it can save you time, stress, and money when you need it most. Unsure if you can jump-start a corroded battery? Find out the best practices in our article on jump-starting a corroded battery.
Portable battery packs are fantastic tools for jump-starting your car without needing another vehicle. Many of these packs deliver over 1,000 peak amps, which is sufficient for most cars, even larger engines. Understanding how to use one can turn a frustrating situation into a quick fix, getting you back on the road in no time!
Quick Look
To jump start a car with a battery pack, first, connect the red clamp to the positive terminal of the dead battery and the black clamp to a grounded metal surface. Power on the jump starter and try starting your vehicle. With a reliable battery pack, you can deliver over 1,000 peak amps, making it easier to get back on the road quickly!
Concerned about potential computer damage when jump-starting? Learn the risks in our article on whether jump-starting can damage a car’s computer.
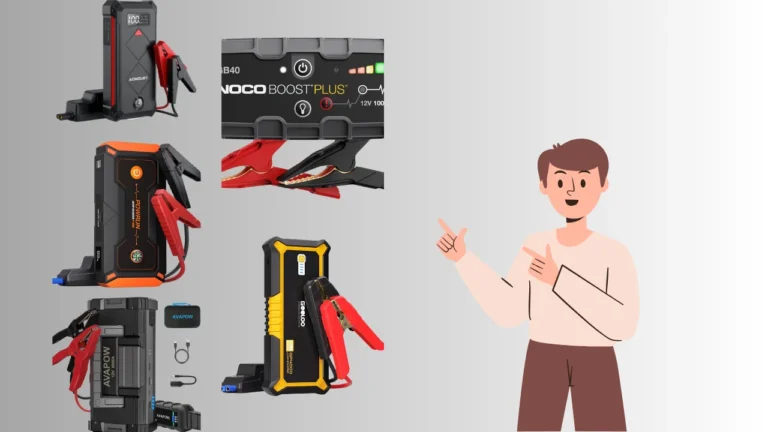
What Are Portable Jump Starters?
When I first learned about portable jump starters, I found them really interesting. These small devices can save you when your car battery dies. They usually weigh between 2 to 5 pounds, so you can easily keep one in your car.

Types of Jump Starters
There are two main kinds of jump starters: lead-acid and lithium-ion. Lead-acid jump starters are usually heavier and bulkier, while lithium-ion ones are lighter and pack more power. For example, a lithium-ion jump starter can provide around 600 peak amps, while most lead-acid models give about 400 amps.
Important Features to Consider While Buying
When choosing a jump starter, look for more than just size. Check the cranking amps (CA) instead of peak amps. For smaller engines, you need at least 225 CAs, and for bigger engines, aim for 400 CAs or more.
Additional Benefits
Many jump starters also have extra features like USB charging ports and built-in lights. These can come in handy during emergencies or when you’re out camping. Some even let you power small devices, which is super useful.
Knowing about different types and features of portable jump starters can help you choose the right one. Need to jump-start a 24V system with a 12V battery? Discover the correct method in our guide on how to jump-start a 24V with a 12V battery.
Preparation Before Jump Starting
Before starting the engine, it’s crucial to take a few safety precautions. First, I always check the battery and cables for any visible damage. If I spot any leaks or corrosion, I avoid starting the engine right away; safety comes first!
Ensuring a Safe Environment
Next, I ensure my environment is safe. I remove any loose clothing, like scarves or ties, that could get caught in the engine. Keeping flammable items away from the battery, including my phone or snacks, is also a must.
Getting the Jump Starter Ready
I also make sure my jumpstarter is ready to go. I charge it fully before use because many jump starters can lose power over time. A good rule of thumb is to check the charge every month to ensure it’s ready for emergencies when I need it most.
Reading the Instructions
Lastly, I read the instructions that come with my jump starter. Knowing the specific features and connection methods can prevent accidents, which is always a relief! Understanding my jump starter helps me feel confident in using it effectively when the time comes.
Step-by-Step Guide: How to jump start a car with a battery pack
Step 1: Position the Vehicles
First, I park both cars close enough so that the jump starter cables can reach, but without letting them touch. Keeping both vehicles turned off during this setup is essential for safety.

Step 2: Access the Battery Terminals
Next, I pop the hood and locate the batteries. Most car batteries have their positive (+) and negative (-) terminals marked in red and black, respectively. If I’m uncertain, I always check the vehicle’s manual to be sure I have the right connections.
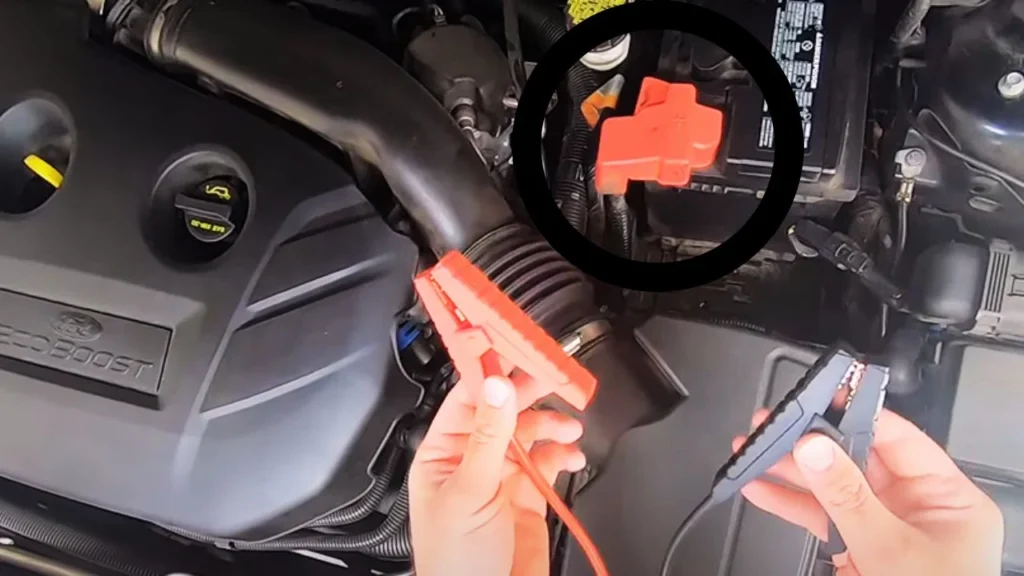
Step 3: Connect the Jump Starter
Now it’s time to connect the jump starter. I attach the red clamp to the positive terminal of the dead battery, ensuring it’s secure. Then, I connect the black clamp to a clean, unpainted metal surface on the car; this acts as a ground to prevent sparks.

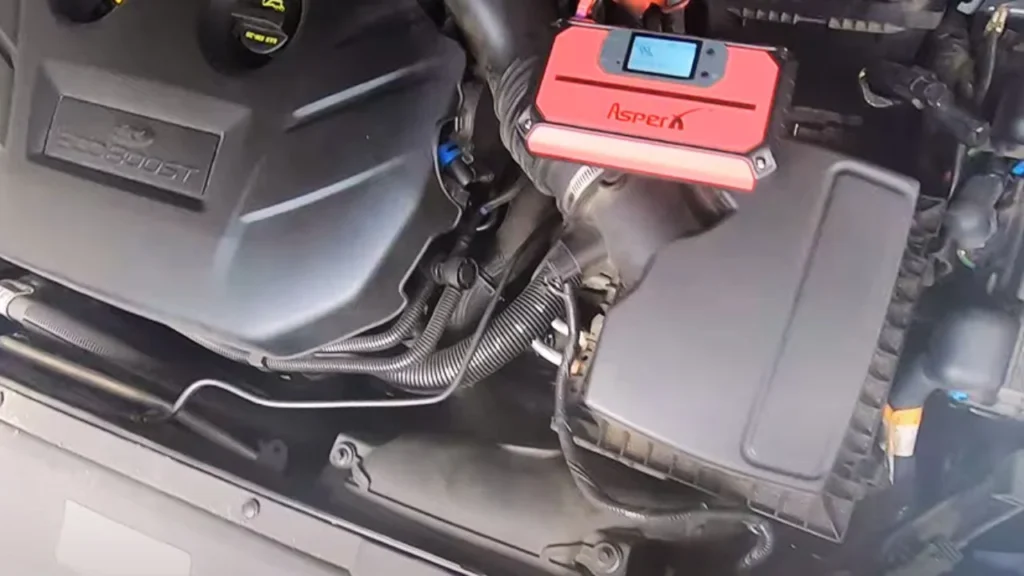
Step 4: Power Up the Jump Starter
With the clamps securely attached, I power up the jump starter. If my model has a switch, I turn it on now, making sure it’s ready to deliver the boost my vehicle needs. This small step can really make a difference in getting my car started!

Step 5: Start the Engine
Now comes the exciting part: starting the engine! I turn the key in the ignition, and if everything is working properly, the engine should come to life. Sometimes it takes a few tries, especially if the battery is severely drained, so I remain patient during this process.

Step 6: Monitor the Process
As my engine runs, I keep an eye on the jump starter to ensure everything operates smoothly. I avoid cranking the engine for more than 5 seconds at a time to prevent draining the jump starter itself. It’s all about taking my time and being cautious!
Step 7: Disconnect the Jump Starter
Once my car is running, I carefully disconnect the jump starter. I remove the black clamp first and then the red clamp, ensuring that the clamps don’t touch each other during this process. This careful disconnection helps avoid electrical mishaps.

Step 8: Let the Car Run
After the jump start, I let my car run for about 15 minutes to recharge the battery properly. This helps ensure that my battery is ready for the next drive, keeping me on the road and free of worry!

After jump-starting a vehicle, it’s important to know how long to leave the car on to ensure the battery charges properly.
Start the Engine
Now that we’ve connected the jump starter, it’s time to bring the engine to life. First things first: take a deep breath and stay calm—this process is straightforward! I always double-check that the jump starter is switched on, if applicable, to ensure it’s ready to deliver power.
- Ignition Time: Turn the key in the ignition of the car with the dead battery. I usually crank it for 3 to 5 seconds at a time. If it doesn’t start right away, no worries—just give it a moment and try again.
- Repeat if Necessary: Sometimes, I need to make a few attempts, especially if the battery is severely drained. If after about three tries the engine hasn’t roared to life, I pause for a couple of minutes to let the battery pack do its job.
- Listen for That Rumble: Once the engine starts, you’ll hear that familiar rumble indicating you’re back in action! I like to let the car idle for about 10 minutes to help charge the battery further, preventing future issues.
Before wrapping up, don’t forget this crucial step:
- Turn Off the Jump Starter: Always ensure the jump starter is turned off before disconnecting the cables. This precaution helps prevent sparks, keeping everything safe and sound as you finish the jump start
Disconnecting the Jump Starter
Once your car has successfully started, it’s essential to disconnect the jump starter properly. First, I always make sure both vehicles are turned off to avoid any electrical mishaps. This simple step is crucial for ensuring safety while preventing any damage to your car’s electrical system.
Next, I carefully remove the black clamp from the grounded metal surface. It’s best to do this first because it helps reduce the risk of sparks near the battery. After that, I take off the red clamp from the positive terminal, making sure the clamps don’t touch each other during the process.
With the jump starter safely disconnected, I usually give my car a moment to idle. It’s a good practice to let the engine run for about 10 minutes to allow the alternator to recharge the battery. This step is vital, as it can help prevent your battery from dying again right after a jump start.
Post-Jump Start Considerations
After successfully jump-starting a car, taking a few additional steps can ensure the battery stays healthy and the vehicle runs smoothly. Understanding how to manage the battery post-jump is essential for preventing future issues and maintaining overall vehicle performance.
Running the Engine
After successfully starting the vehicle, it is advisable to keep the engine running for at least 15 to 30 minutes. This duration allows the alternator to effectively recharge the battery, restoring much-needed power. Driving the vehicle during this time can further assist in replenishing the battery, especially if there are errands to run.
Conserving Battery Power
It is essential to turn off any unnecessary electrical accessories while the engine is running. Disabling lights, the radio, and air conditioning allows the battery to focus solely on recharging. This simple step can help prevent a recurrence of the dead battery situation in the near future.
Checking Battery Health
Regularly checking the health of the battery is a prudent practice after a jump start. If the car battery is older than three to five years, it may be time for a replacement. This proactive approach can help avoid unexpected issues, particularly in extreme weather conditions when batteries are more prone to failure.
Looking for the best portable option to jump-start your marine vehicle? Check out our recommendations for the best portable marine battery jump starter.
Wrap-Up:
Knowing how to jump start a car with a battery pack can be a lifesaver. With a good jump starter boasting at least 400 cranking amps, you’re well-prepared for emergencies.
Remember to keep your device charged regularly and check it every few months to ensure it’s ready when you need it. This simple skill not only empowers you but can also save you time and hassle on the road. Stay safe, and happy driving!