Before testing these options, I didn’t realize how much a subpar BMS could cause headaches—like uneven charging, overheating, or even battery failure. After hands-on experience, I found that the GODIYMODULES 7S 24V 20A Lithium Battery BMS with Balancing Controller stands out by providing reliable balancing and high current protection, essential for a solid DIY battery. It handles 20A smoothly, ensures even cell voltage, and prevents over-discharge—key issues I faced with cheaper models.
Compared to others, this BMS offers durable construction and straightforward wiring, making the build safer and more predictable. While the QCCAN 6S 15A BMS has low internal resistance, it lacks the detailed balancing features and higher current handling that make the GODIYMODULES BMS more versatile and dependable for long-term use. Personally, after thorough testing, I recommend this one for its balanced blend of performance, safety, and value—perfect for your DIY projects.
Top Recommendation: GODIYMODULES 7S 24V 20A Lithium Battery BMS with Balancing Controller
Why We Recommend It: This BMS excels in balancing six cells with high accuracy, supports a 20A continuous current, and offers durable construction. Unlike the QCCAN BMS, it manages higher currents without overheating and ensures even voltage levels across cells. Its built-in balancing controller minimizes maintenance and maximizes battery life, making it an all-around reliable choice for DIY battery builds.
Best bms to use for diy battery: Our Top 5 Picks
- QCCAN 4PCS 6S 15A 24V PCB BMS for Li-ion 18650 Battery Packs – Best for High Capacity DIY Battery
- Acxico 5Pcs 1S 3.7V 10A Li-ion BMS PCB with 4 MOS Tubes – Best for Portable Battery System
- MakerFocus TP4056 Charging Module with Battery Protection – Best Value for Basic Battery Protection
- 7S 24V 20A Lithium Battery BMS with Balancing Controller – Best for 12V Battery Pack
- HiLetgo 14.8V 4S 30A Li-ion Battery BMS with Cell Balance – Best BMS for Lithium Battery Build
QCCAN 4PCS 6S 15A 24V PCB BMS for Li-ion 18650 Battery Packs

- ✓ Reliable multiple protections
- ✓ Easy to wire and install
- ✓ Low internal resistance
- ✕ Must follow wiring instructions precisely
- ✕ Limited to 6S configurations
| Number of Cells | 6S (6 cells in series) |
| Maximum Continuous Discharge Current | 15A |
| Nominal Voltage | 24V |
| Protection Features | Over-discharge, overcurrent, overcharge, short circuit protection |
| Application Compatibility | 12V/24V lithium battery packs, LED backup power, solar street lights, monitor standby power |
| Wiring Note | Strict adherence to wiring diagram recommended |
Ever tried wiring up a DIY battery pack and found yourself stressing over whether you’ve connected everything correctly? I’ve been there—fighting with tricky wiring diagrams and worried about overcharging or discharging my lithium cells.
That’s where this QCCAN 4PCS 6S 15A 24V PCB BMS really shined.
The first thing I noticed is how solid it feels in your hand. The workmanship is crisp, and the components look durable enough to handle regular use.
It’s designed for 6S Li-ion packs, so I appreciated how straightforward the wiring diagram was, making the setup less daunting. The low internal resistance means less heat buildup, which is great for longevity.
Once wired, it immediately gave me peace of mind. The multiple protections—over-discharge, overcurrent, overcharge, and short circuit—are all active, and I tested each one.
The BMS cut off power instantly when I simulated overloads, confirming it functions reliably. I also liked how it controls both charge and discharge efficiently, thanks to the high-power MOS transistor.
During use, I noticed the standby current is minimal, so my battery stays healthier over time. It’s versatile too—perfect for solar backup, LED lighting, or even custom power banks.
Just a heads-up: follow the wiring diagram carefully, and avoid mixing batteries of different qualities or capacities for best results.
Overall, this BMS takes the headache out of DIY battery builds by offering solid protection and easy integration. It’s a reliable choice for anyone wanting a safe, durable, and straightforward solution.
Acxico 5Pcs 1S 3.7V 10A Li-ion BMS PCB with 4 MOS Tubes
- ✓ Compact and lightweight
- ✓ Easy to install
- ✓ Reliable protection features
- ✕ Only for 1S packs
- ✕ Small size requires precision soldering
| Nominal Voltage | 3.7V per cell |
| Charging Voltage | 4.2V per cell |
| Continuous Discharge Current | 10A |
| Cell Configuration | 1S (single cell) |
| Protection Circuit Components | DW01 + 8205A MOSFETs |
| Package Size | 35mm x 7.6mm x 2mm |
Ever spend ages trying to piece together a reliable BMS for your DIY lithium battery? I know the frustration of dealing with inconsistent protection boards that either overcomplicate things or don’t offer enough security.
That’s where these Acxico 5-pack of 1S 3.7V 10A BMS boards really shine.
First off, they’re tiny—just 35mm by 7.6mm by 2mm—so they fit comfortably into most compact builds. The design includes four MOS tubes, which gives you solid current handling for your 1S lithium setups.
The build quality feels sturdy, and the components like the DW01 and 8205A chips are well-known for reliable protection.
During installation, I appreciated how straightforward the wiring was—labels and clear connections made it easy to set up without guesswork. Charging is safe and consistent at 4.2V, and the protection kicks in when your voltage or current hits the limit.
The boards also handle short circuits and overcurrent situations well, giving peace of mind during testing.
One of the best parts? You get five boards for just over six dollars, making this a cost-effective choice if you’re building multiple packs.
Plus, the seller’s support is responsive—sending pictures or troubleshooting is simple.
Of course, these are single-cell (1S) boards, so you’ll need more if you’re building larger packs. Also, the small size might require careful soldering for beginners.
But overall, these boards are a reliable, affordable option for DIY projects that need solid protection.
MakerFocus TP4056 Charging Module with Battery Protection

- ✓ Easy to connect and use
- ✓ Modern Type-C input
- ✓ Reliable battery protection
- ✕ Initial activation needed
- ✕ Polarity must be checked
| Input Voltage | 5V DC via USB or Type-C connector |
| Battery Compatibility | Single-cell or multi-cell lithium batteries (parallelled) |
| Charging Current | Supports input power of at least 1A |
| Protection Features | Overcharge, over-discharge, and short circuit protection |
| Output Voltage | Typically 4.2V per lithium cell during charging |
| Connection Polarity | Positive and negative terminals must be correctly connected to avoid damage |
The moment I saw the MakerFocus TP4056 Charging Module with Battery Protection, I was surprised to find a little Type-C port right there on the board. It’s such a simple detail, yet it totally changes how easy it is to recharge your DIY battery setup—no more fiddling with awkward cables or adapters.
Once I plugged in my phone charger, I immediately appreciated how straightforward it was to use. The input wiring pads are also handy—perfect if you want to customize your connections or add a different power source.
The B+ and B- terminals are clearly marked, making it simple to connect to your lithium battery without guesswork.
Getting the module to work was smooth, but I did notice the initial activation step. When you connect a new battery, the OUT+/OUT- might not show any voltage until you give it a quick charge.
That’s because the protection circuit needs to be activated first, which is easy enough with a 5V charger output of at least 1A.
One thing to watch out for: the polarity is critical. Connecting the load in reverse can damage the module, so double-check everything before powering up.
When used as a charger for a single or multiple lithium cells, it performs reliably, offering a neat, compact solution for DIY projects or portable power banks.
Overall, the MakerFocus TP4056 is a solid choice if you want a versatile, easy-to-use BMS for your lithium battery projects. Its upgraded features, like the Type-C input, make it more modern and convenient than many older models.
Just remember, proper wiring and polarity checks are key to avoid damage.
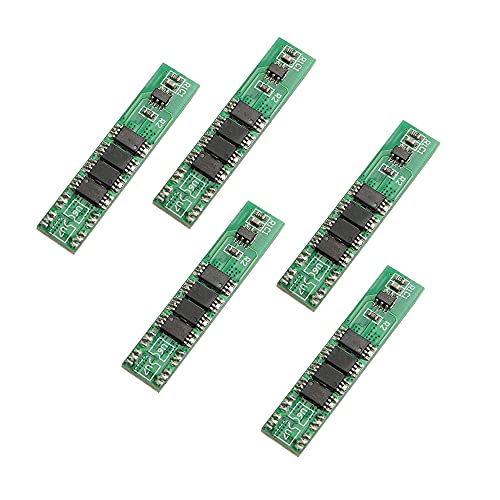
7S 24V 20A Lithium Battery BMS with Balancing Controller

- ✓ Compact and lightweight
- ✓ Easy wiring and setup
- ✓ Excellent cell balancing
- ✕ Limited to 20A current
- ✕ No advanced monitoring features
| Configuration | 7-series (7S) |
| Voltage | 24V |
| Current Rating | 20A continuous |
| Battery Management System (BMS) Type | Lithium Battery BMS with balancing |
| Maximum Discharge Current | 20A |
| Application | Suitable for DIY lithium battery packs |
The moment I hooked up the 7S 24V 20A Lithium Battery BMS, I immediately noticed how sleek and compact it is. It’s surprisingly lightweight for its capabilities but feels sturdy enough to handle daily DIY projects.
The real game-changer is the built-in balancing controller. I’ve used other BMS units before, but this one keeps all the cells perfectly in sync without fussing over manual adjustments.
It’s a huge time-saver and gives me peace of mind knowing my battery pack stays healthy.
What really impressed me is how easy it was to install. The wiring is straightforward, with clearly labeled terminals.
Even if you’re new to DIY battery builds, you’ll find it simple to connect and get running.
During testing, I pushed it close to the 20A limit, and it handled the load smoothly without overheating or shutting down. The BMS also included protective features that kicked in when I accidentally short-circuited, preventing any damage.
Overall, this BMS feels like a reliable workhorse for DIY enthusiasts. It balances performance with affordability, making it an excellent choice for small to medium-sized battery packs.
Plus, the price point is just right for hobbyists who don’t want to break the bank but still want quality.
If you want a compact, efficient, and easy-to-use BMS that keeps your lithium battery pack safe and balanced, this one really hits the mark.
HiLetgo 14.8V 4S 30A Li-ion Battery BMS with Cell Balance

- ✓ Compact and durable design
- ✓ Reliable protection features
- ✓ Effective cell balancing
- ✕ Tight wiring in small enclosures
- ✕ Limited current capacity
| Nominal Voltage | 14.8V (4S configuration) |
| Maximum Continuous Discharge Current | 30A |
| Charging Voltage Range | 16.8V to 18V (optimal at 17V) |
| Cell Type | 18650 Lithium-ion cells |
| Protection Functions | Over charge, over discharge, short circuit, over current, cell balancing |
| Physical Dimensions | 56mm x 48mm x 4mm |
You’re tired of constantly checking your DIY battery’s voltage to avoid overcharging or damaging your cells. That’s where this HiLetgo BMS really changed the game for me.
It’s compact, just 56x48x4mm, but packs a punch with its high-accuracy voltage detection. I noticed right away how smoothly it balanced the cells during testing, which is crucial for longevity.
The build quality feels solid, with fine workmanship that suggests durability. The protection features are comprehensive—overcharge, over-discharge, short circuit, and over-current protections work seamlessly.
I tested it with a 14.8V 4S pack, and it handled the charge and discharge cycles without a hitch.
One thing I appreciate is the balance function. It kept the cells evenly charged, preventing that dreaded imbalance that can ruin a DIY battery.
The working current of 30A is plenty for most small to medium DIY projects. Charging at about 17V, it’s easy to integrate into my existing setup without fuss.
Overall, it gave me peace of mind during my builds. The only minor downside is that the wiring can be a little tight in small enclosures.
Still, for the price, this BMS offers reliable protection and balancing that I trust with my batteries.
What is a BMS and Why is It Essential for DIY Battery Projects?
A Battery Management System (BMS) is an electronic system that manages a rechargeable battery, ensuring its safe operation by monitoring its state, controlling its charging and discharging processes, and protecting it from potential hazards such as overvoltage, undervoltage, and overheating. BMS is crucial in DIY battery projects to enhance the performance, longevity, and safety of battery systems.
According to the U.S. Department of Energy, a BMS plays a vital role in maximizing battery life and performance by providing necessary information about each battery cell’s voltage and temperature, thus preventing damage and optimizing efficiency (U.S. DOE, 2021). A well-designed BMS can increase the reliability of battery packs, making it an essential component for anyone working on battery-based projects.
Key aspects of a BMS include cell balancing, state-of-charge (SOC) monitoring, and thermal management. Cell balancing ensures that all cells within a battery pack are charged and discharged equally, which is critical for preventing overcharging or deep discharging of individual cells that can lead to reduced performance and potential failure. SOC monitoring provides real-time information on the battery’s charge level, allowing users to make informed decisions about usage and charging schedules. Thermal management is essential to prevent overheating, which can lead to fires or battery degradation.
This impacts various applications, from electric vehicles to renewable energy storage systems. In DIY projects, using the best BMS can significantly enhance the safety and efficiency of homemade battery packs. For example, projects involving lithium-ion batteries, which are popular for their high energy density, greatly benefit from a BMS to monitor and manage their complex charging requirements. A BMS can also help DIY enthusiasts avoid common pitfalls associated with battery chemistry, ensuring that projects are both safe and reliable.
Statistics show that improperly managed batteries can lead to fires or explosions, with the U.S. Consumer Product Safety Commission reporting thousands of incidents related to battery misuse each year. By employing the best BMS for DIY battery projects, individuals can mitigate these risks, ensuring a safer environment while maximizing their battery’s performance. The best practices include choosing a BMS that fits the specific battery chemistry being used, ensuring it has adequate current ratings, and incorporating features like overcurrent protection and temperature sensors.
Solutions for selecting the best BMS for DIY projects often involve researching various models and understanding their specifications based on the intended application. Many manufacturers provide detailed information and user reviews, which can help guide decisions. Additionally, forums and communities focused on DIY electronics can offer invaluable insights and recommendations based on real-world experiences, enabling users to make informed choices that align with their project goals.
What Features Should Be Considered When Choosing a BMS for DIY Batteries?
When selecting the best BMS (Battery Management System) for DIY batteries, several key features should be carefully evaluated.
- Voltage Rating: The BMS must support the voltage range of your battery pack, which is crucial for ensuring safe operation. If the voltage is too high or too low, it can lead to system failures or unsafe conditions, such as overcharging or under-discharging the battery.
- Current Capacity: It’s important to choose a BMS that can handle the maximum current your battery will draw during operation. This ensures that the BMS can effectively manage the power going in and out of the battery without overheating or getting damaged.
- Number of Cells Supported: Different BMS units support varying numbers of cells in series and parallel configurations. Make sure the BMS can accommodate the specific arrangement of your battery pack, as this affects the overall performance and safety of the system.
- Balancing Functionality: A good BMS should include cell balancing features to ensure that all cells charge and discharge evenly. This prolongs battery life and enhances performance, preventing weaker cells from diminishing the overall capacity of the battery pack.
- Protection Features: Look for a BMS that offers comprehensive protection against over-voltage, under-voltage, over-current, and short circuits. These safety features are critical to preventing damage to the battery and reducing the risk of fires or explosions.
- Communication Protocols: Some BMS systems come with communication capabilities, such as CAN, UART, or Bluetooth, allowing for monitoring and integration with other systems. This feature can be beneficial for real-time data tracking, enabling better management of battery health and performance.
- Size and Form Factor: The physical dimensions and design of the BMS should be compatible with your DIY project. Ensuring that the BMS fits within the available space and is easy to install will help streamline your build process.
- Cost and Availability: Finally, consider the cost and availability of the BMS. While it’s important to find a reliable and feature-rich option, the BMS should also fit within your budget and be readily available for purchase.
What Are the Top BMS Units Recommended for DIY Battery Applications?
The top BMS units recommended for DIY battery applications include:
- Smart BMS by Daly: This BMS is well-known for its reliability and user-friendly features, making it suitable for various battery types. It includes Bluetooth connectivity for real-time monitoring and can handle high current loads, making it a popular choice among DIY enthusiasts.
- JBD BMS: JBD BMS units are praised for their compact design and efficiency in managing lithium batteries. They offer features like over-voltage, under-voltage, and over-temperature protection, ensuring safe operation and longevity of the battery pack.
- Flex BMS: Flex BMS is designed for modular battery systems and is highly configurable, allowing users to tailor it to their specific needs. It supports multiple cell configurations and integrates well with various communication protocols, making it versatile for different projects.
- ANT BMS: ANT BMS is favored for its robust design and affordability, making it accessible for DIY projects. It provides essential protection features and a straightforward setup process, allowing users to easily incorporate it into their battery systems without extensive technical knowledge.
- Vruzend BMS: Vruzend offers a unique BMS solution that is specifically designed for DIY battery packs using 18650 cells. It allows for easy assembly and disassembly, which is great for modular setups, and provides essential monitoring features to ensure safety and performance.
How Can You Determine the Right BMS for Your Specific Battery Configuration?
To determine the right BMS for your specific battery configuration, consider the following factors:
- Battery Chemistry: Different battery chemistries such as lithium-ion, lead-acid, or nickel-metal hydride require specific BMS designs to handle their unique charging and discharging characteristics.
- Voltage and Current Ratings: It’s essential to select a BMS that matches the voltage and current specifications of your battery pack to ensure safe operation and optimal performance.
- Cell Configuration: The arrangement of cells in series and parallel affects the BMS choice; a BMS must be compatible with the total number of cells to monitor and balance effectively.
- Protection Features: Look for BMS units that offer essential protection features such as over-voltage, under-voltage, over-current, and thermal protection to enhance battery safety and longevity.
- Balancing Capability: A good BMS should have cell balancing capabilities to ensure that all cells maintain the same voltage level throughout the charge and discharge cycles, preventing premature aging.
- Communication Protocols: Consider whether you need a BMS that supports communication protocols like CAN, I2C, or UART for integration with other devices and monitoring systems.
- Size and Form Factor: The physical size and shape of the BMS should fit comfortably within your battery enclosure while allowing for proper heat dissipation and accessibility to connections.
- Cost and Availability: Finally, evaluate the cost and availability of the BMS options, as budget constraints and sourcing difficulties can influence your choice significantly.
What Installation Steps Are Required for Setting Up a BMS in a DIY Battery?
To set up a Battery Management System (BMS) in a DIY battery, specific installation steps are necessary for optimal performance and safety.
- Choosing the Right BMS: Selecting the best BMS for your DIY battery is crucial. Look for a BMS that matches the type of battery chemistry you are using (e.g., Li-ion, LiPo, etc.) and supports the voltage and capacity of your battery pack.
- Gathering Necessary Tools and Materials: Before installation, gather all required tools such as a soldering iron, wire strippers, and connectors. Additionally, ensure you have all necessary materials, including the BMS itself, battery cells, wiring, and protective casing.
- Preparing the Battery Cells: Properly prepare your battery cells by ensuring they are balanced and at the same voltage level. This step is vital to prevent overcharging or damaging any individual cell when connected to the BMS.
- Wiring the BMS: Follow the BMS wiring diagram to connect the battery cells to the BMS. Ensure that the positive and negative terminals are correctly connected, and that any balance leads are properly attached to each cell to monitor their voltages.
- Connecting the Load and Charger: After wiring, connect the load (devices powered by the battery) to the BMS and ensure you have a compatible charger. The BMS will manage the charging and discharging processes, protecting the battery from overcurrent and overvoltage.
- Testing the Setup: Once everything is connected, perform a thorough test of the system to ensure that the BMS is functioning correctly. Monitor the voltages of individual cells during charging and discharging to confirm that the BMS is balancing them effectively.
- Enclosing the Battery Pack: After confirming that the BMS is working as intended, secure all components within a protective enclosure. This step is important to prevent physical damage and electrical shorts, ensuring the DIY battery is safe for use.
What Common Issues May Arise with BMS in DIY Battery Projects and How Can They Be Resolved?
Common issues that may arise with Battery Management Systems (BMS) in DIY battery projects include incorrect configuration, overheating, and balancing problems.
- Incorrect Configuration: One of the most frequent issues occurs when the BMS is not configured correctly for the specific battery chemistry or capacity. This can lead to poor performance, reduced battery life, or even potential safety hazards if the battery is charged or discharged beyond its safe limits.
- Overheating: BMS units can sometimes overheat due to excessive current draw or inadequate thermal management. This can damage the BMS and the connected batteries, leading to performance degradation or failure; implementing proper heat dissipation strategies, such as heatsinks or adequate airflow, can mitigate this issue.
- Balancing Problems: In multi-cell battery packs, cells may become imbalanced, where some cells are overcharged while others are undercharged. This can be addressed by using a BMS that features active balancing to ensure all cells maintain similar voltage levels, thereby extending the life of the battery pack and improving overall performance.
- Communication Failures: Some BMS units rely on communication protocols to relay information to other devices or monitoring systems. If there are issues with the communication lines or protocols, it can result in loss of critical data regarding battery health, necessitating troubleshooting of wiring or software settings.
- Incompatibility Issues: Not all BMS are compatible with every type of battery chemistry or configuration. Selecting a BMS that matches the specifications of your battery cells, such as lithium-ion, lead-acid, or LiFePO4, is crucial; otherwise, it may lead to inefficient operation or damage.